
Do you want to save money on plumbing fixes but don’t know where to start? You can do many minor repairs yourself and with this guide, it’s easier than ever! We’ll provide all the resources and tips you need to make quick, successful plumbing repairs. Whatever the issue, don’t wait for a professional–you can get started now!
Clearing a Clogged Drain
If you experience an unusually slow drain, it may be clogged. Clearing a clogged drain is usually an easy task and one that can often be done without bringing in a plumber. Before you get started, know where your main water valve is located; it will come in handy if there is an overflow or any other kind of problem during the job.
Try this first: Boil a pot of water on the stove and pour about half of it down the drain. This technique works best for clogs caused by grease buildup but won’t clear away more substantial blockages such as tree roots or major buildup from hair and soap scum.
If boiling water doesn’t do the trick, take a plunger to the blockage. Make sure there is enough water in the affected sink (or tub) to cover the plunger’s cup so that it forms an effective seal when pushed against the drain opening. If that doesn’t work, you may need to try snaking out the pipe – either using a manual or powered snake depending on how severe the backup is – starting at cleanout opening or shower trap if there is no cleanout access available in your system set-up. Ensure that you exercise caution when using aggressive methods like electric snakes as they can cause damage if not handled properly!
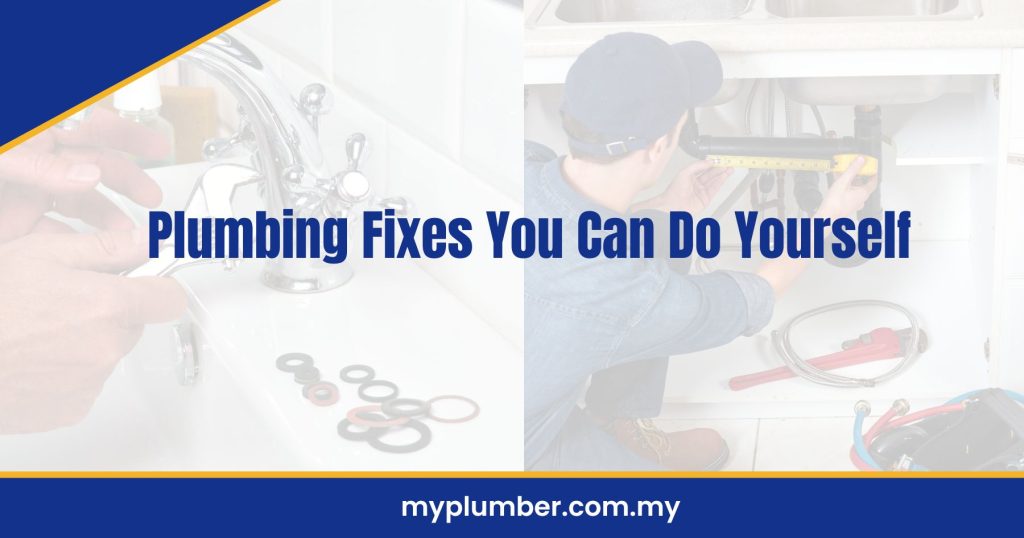
Fixing a Leaky Tap
Leaks in taps are some of the most common plumbing problems encountered at home. Fixing them can save you a lot of money in water bills and the parts to repair them are relatively inexpensive. Enlisting professional help can be expensive, so it is often recommended to attempt a DIY solution.
- First, you’ll need to turn off the water supply at the pipe valves under your sink.
- Then, open up the faucet to drain out any residual water that is left in there.
- Use an adjustable wrench or pliers to loosen and remove any decorative pieces on the tap and then unscrew the collar nut which holds in place the valve assembly and washer. Note down how parts were arranged beforehand as this step will involve disassembly of several components which must be reassembled correctly later on.
- Remove all corroded or damaged components from your tap before replacing them with new ones, considering their size and fitting makes sure they match up for a snug fit when reassembling it all back together again!
- Test-run your repaired tap by replacing the initial connection of water supply that was disconnected earlier.
- Finally, if everything works correctly, you should have all other fixtures connected as they should be – ensuring a leak-free connection throughout!
Replacing a Toilet Flush Valve
When replacing a toilet flush valve, there are several parts that must be identified:
- Remove the tank lid.
- Carefully detach the seal from the inner plastic ring of the flush valve and discard it.
- Take out the two bolts that secure to flush valve to the tank lid and remove them.
- Carefully release the seal around the flapper assembly and pull off both parts together.
- Examine each component to ensure they are not visibly damaged or worn out before installing a new replacement kit.
- Reinstall all elements as per manufacturer instructions – ensuring this is completed correctly is key for optimum functioning of your toilet’s flushing mechanism.
Replacing a Sink Trap
Replacing a sink trap can help fix a clogged or smelly sink and can also keep unwanted insects out of the drain. It’s a relatively simple job and you should have everything you need at your local home improvement store. Before you begin the project, turn off the water supply to the sink and remove any drain stoppers.
Here’s what you’ll need:
- Adjustable wrench
- Teflon tape
- Plumbers Putty
- Replacement trap assembly
- Bucket
- Plunger (optional)
Begin by disconnecting the old sink trap. Use an adjustable wrench to loosen the two nuts that secure it to both ends of the tailpiece, being sure to hold onto each end with your other hand so that it doesn’t drop down into the wall or pipework behind it. Direct any water runoff into a bucket as you do this, then unscrew and remove the entire unit.
Clean away any excess putty with warm soap and water and dry thoroughly, then wrap Teflon tape around both ends of your new trap assembly before connecting them together. Fit one end over your tailpiece and adjust tightly with an adjustable wrench until secure, then fit the other end into your drainpipe in much the same way using a plunger as necessary if there is resistance. Finally, tighten with an adjustable wrench again until securely fastened in place, add plumber’s putty under each piece for extra sealant protection if desired, then turn on your water supply again when finished.
Unclogging a Shower Drain
Unclogging a shower drain is an easy job, but it can take some time depending on how serious the clog is. Before you attempt any type of fix, make sure you understand exactly what type of plumbing system you have and familiarize yourself with the appropriate tools needed to complete the job safely.
The first step in unclogging a shower drain is to remove any debris or hair that may be causing the clog. To do this, use something like a mesh catch basin (a device specifically designed for this purpose), or a simple coat hanger. Insert the device down into the drain and scoop out any hair and debris.
Once you have removed anything visible from your pipe, it’s time to actually unclog it. There are several methods that can be used depending on what material your pipe is made of and how severe the clog actually is:
- If you were unable to remove anything with the mesh catch basin, try using a commercial drain cleaner or even baking soda and vinegar together to break up whatever is blocking your flow. This can take some time depending on how much clogging material there may be in your pipe, but eventually your water should begin draining properly again once everything has had enough time to dissolve.
- If using chemical methods does not work, consider using a plumbing snake which should help loosen up whatever material has been lodged down there for good!
Fixing a Running Toilet
A running toilet can be an annoying and costly issue, often due to a faulty fill valve. The fill valve is responsible for delivering the correct amount of water to the tank, so fixing it can save you money on your water bill.
- Shut off the water supply by locating the shutoff valve – usually in the wall behind or near the toilet.
- Open the tank lid and use a screwdriver to remove any pins from hinges on the fill valve.
- Disconnect the water supply hose from both ends of the fill valve before lifting it out of your toilet tank.
- Purchase a new fill flush assembly kit to replace with your existing one – these kits are available at most home improvement stores.
- Once installed according to instructions and reattached to your water supply hose, turn on your water supply and check if it functions properly. If not, contact a professional plumbing company for further assistance.
Replacing a Toilet Fill Valve
Replacing a toilet fill valve is one of the easier plumbing repairs that you can do yourself. The parts for this repair are inexpensive and straightforward to install.
To begin, turn off the water shutoff valve to the toilet tank and flush the toilet to empty it. Then, unscrew and disconnect the old fill valve from the water supply line.
To install a new fill valve, refer to the manufacturer’s instructions included with your purchase and begin by attaching it to your water supply line. Once that is secure, insert it into the tank, adjust it according to height specifications and secure with provided mounting hardware. Finally, turn on the water shutoff valve slowly until pressure builds up in the tank and test for leaks around any connections by flushing several times.
If everything looks good after testing, reset your overflow tube level to its specified height and run through one additional flush cycle before replacing any components on top of your tank, such as a lid or knob handles as necessary.
Replacing a Shower Arm
Replacing a shower arm is often a necessary fix when corrosion corrodes the existing part. Before you begin, make sure to gather any specialty parts required for your particular shower model, such as brass adapters or escutcheons. To start, turn off the water supply so that no water runs when disassembling and assembling the elements of the plumbing system. Once you have gathered all of your tools and supplies, it’s time to get to work!
- Unscrew the old arm using an adjustable wrench.
- Clean off any debris from the connection area before installing the brass adapters or escutcheons included in your shower model if necessary.
- Apply Teflon tape around the threads on the new arm with clockwise motion before slipping it into place.
- Use wrench to secure the connection and check for leaks before turning on your water again.
Insulating Hot Water Pipes
Insulating hot water pipes is an easy and inexpensive way to help keep your house warm in the winter. The benefits of this measure are twofold: insulating your hot water pipes can help keep your home’s temperature more consistent and keep cooling costs down by reducing heat loss from the pipes. This project does not need to be a complicated process, and there are some quick solutions for insulating your pipes that you can complete yourself without complex tools or experience.
Materials Needed:
- Tape measurer
- Insulation sleeves
- Utility knife
- Adhesive or fasteners (e.g., screws, zip ties)
- Dust mask
Instructions:
- Identify the pipes that need to be insulated – they’ll be the ones that supply hot water. Use a tape measurer to take their circumference and length, so you know what size insulation sleeves will fit over them properly.
- Find insulation sleeves that come in pre-measured lengths and sizes; these are available in most department stores and can usually be found with other pipe fittings. Make sure the sleeve is made specifically for hot water pipe insulation, as some varieties only work for cold lines.
- Cut each sleeve so it fits snugly around its matching pipe using a utility knife, allowing 1/2 inch of space from the pipe walls so they can move freely within the sleeve when they expand with temperature swings or pressure changes in the line.
- Secure each end of each sleeve with adhesive or fasteners such as screws or zip ties; this will ensure it stays in place once it’s installed over its respective pipe(s).
- Wear a dust mask during installation in order to avoid breathing any potential dust stirred up when cutting insulation sleeves or moving around existing insulation fibers within walls or other spaces near where you’re working; protect your eyes from wood chips, dirt, insulation pieces and other debris who could be disturbed while pushing insulation into place with your hands.
Replacing a Kitchen Sink Strainer
If your kitchen sink strainer becomes damaged or clogged, it can cause water backups and other plumbing problems. Fortunately, you can easily replace a sink strainer with a few simple tools.
First, identify the type of sink strainer you have – whether it’s an insert type or threaded type – as this will determine which tools you need to do the job. If you have an insert type strainer, use pliers to unscrew the nut on top of the sink basket and gently pull to remove it. For threaded types, use adjustable wrenches to unscrew the locknut at the bottom of the basket before removing it.
Next, if your new strainer doesn’t come with a press-and-seal washer, use plumber’s putty to form a ring around the flange that fits over the opening in your sink. It’s important that this is leakproof.
Once you have made all these necessary preparations, install your new kitchen sink strainer by:
- Placing it securely in position and applying pressure so that it stays in place once put back together again.
- For an insert model, tightening the locking nut from beneath using pliers;
- For a threaded type, sealing around locknut first before screwing into drain hole from beneath tight with towels or adjustable wrenches to ensure proper fitment for leak prevention.
- Finally, turn on water supply and test for any leaks!
Conclusion
Remember, before you undertake any plumbing project or system repairs, always check with the appropriate local municipal codes and regulations. When in doubt, contact a professional plumber to ensure that your repair is completed correctly and safely.
Once you understand the basics of home plumbing systems, many minor repairs and maintenance tasks can be tackled on your own. With a little time, research, and preparation you can save yourself time and money by completing simple plumbing fixes on your own.
Frequently Asked Questions
What basic tools do I need to do plumbing repairs?
You will need basic tools like screwdrivers, wrenches, and pliers. You may also need a soldering iron, plumber’s putty, and pipe cutters.
What are some simple plumbing fixes I can do myself?
Some simple plumbing fixes include unclogging sinks, replacing a sink stopper, repairing a leaky faucet, repairing a toilet flapper, and replacing a showerhead.
How do I stop a running toilet?
To stop a running toilet, you should check the flush handle, the flapper, and the fill tube. You may need to replace the flapper if it is worn or not sealing properly.
Andrew Lee is the founder of My Plumber. He has been in the industry for over 20 years and has extensive experience in all aspects of plumbing. He also enjoys sharing his knowledge with others and has written several articles and given talks on plumbing.